It took some doing, but I finally got around to playing a session of War of the Ring. Sean had included the Battles of the Third Age expansion with the game he lent to us. but after studying the rules for a while, I opted to just stick with the base game. While the basic mechanics are quite straightforward, there are many little quirks to the rules and including the expansion would just have added more. This turned out to be the right decision because Shan was already overwhelmed by the amount of detail in the base game and had trouble remembering all of the rules.
Since there’s no way I’m going to summarize the rules of a game of this scale, I’ll just skip to my thoughts about the design:
- It’s still primarily a wargame. The Fellowship movement rules are rather clever and it’s certainly an essential part of the game, but I think players are still spending most of their time mustering armies and pushing them around the board.
- It’s easily the most thematic game I’ve ever played, easily outstripping such strong contenders as Space Hulk and Battlestar Galactica. I can’t think of a single element of the rules, down to the three Elven rings, that feels extraneous. There are certainly a ton of things to remember, every bit of which fits marvelously well with the lore, but all of it helps make it a better game.
- The action dice mechanics are great and the different number of dice for the Shadow Player and the Free Peoples’ player nicely captures the disparity in power between the bad guys and the good guys. The combat rules are also intuitive and quick. No messing around with many different types of units in this game, unlike Axis & Allies.
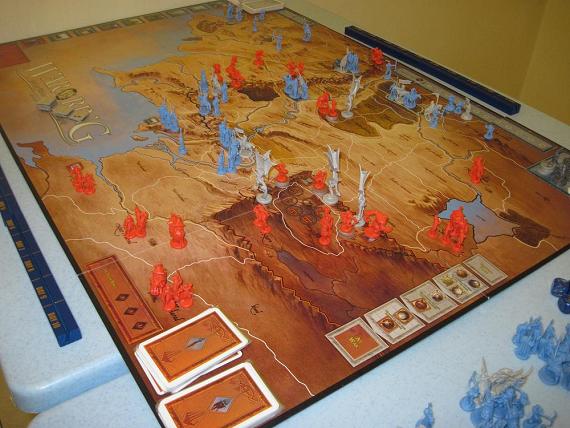
- That said, the board design and aesthetic choices leave a lot to be desired, at least in this edition of the game. For one thing, the board is huge, but because of the ocean portrayed on it, a good portion of it is simply wasted space. Anyway, Shan and I used this space for our dice tower to roll dice on. Another complaint is that they didn’t color the different units and regions of each faction differently enough, making it unnecessarily hard to see critical information. I get that they want the board to look good and making it more stylized would hurt that aesthetic, but in my book gameplay always wins out over aesthetics whenever there is a conflict. Even the black lines denoting impassable borders aren’t thick enough!
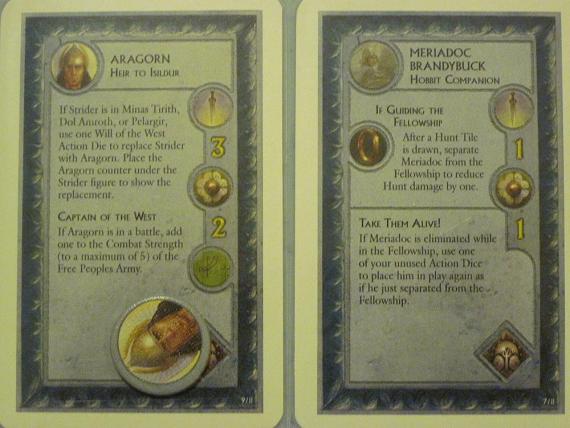
- Even the cards are hard to use. They’re dual use, needing an action to play on the strategic level but may also be played without spending an action to help you out in a combat round. This is genius but it does mean that there’s a lot of text on each card. This also meant that they had to use a very small font size, which made the cards hard to read. In our game, reading the cards was the one single aspect of the game that took most of the time for Shan, since she had to read all of the text carefully and consider when to use them for combat or when to save them for strategic events. The font size must have been an added difficulty on top of that.
- Finally, some regions of the game seem to be included for the sake of completeness but it’s hard to see what gameplay effect they could possibly have. Is the Shadow ever going to threaten the Grey Havens or the Shire? Do the elves and Northmen there play any role at all throughout the game? On the other hand, some regions on the map get really busy and you never have enough space there to place all of the required figures. It would have been better to make a geographically incorrect map with deformed regions to accommodate gameplay.

Our game took nearly six hours but this included about an hour and a half of rules explanation. Shan played the Shadow as we felt the role had less pressure and I played the Free Peoples. At one point in the game, Shan came close to winning a military victory, earning 8 Victory Points for occupying Lorien, Hornburg, Rivendell and the Woodland Realm. But she grew too aggressive and left her own shadow strongholds undefended, so I eventually managed to conquer Orthanc and Moria. Some highlights:
- Lorien fell very quickly and easily to forces dispatched from Dol Guldur and Moria.. I don’t really see how I could defend it. I guess this might be why the designers included Galadriel in the expansion, making it a tougher nut to crack.
- Shan played a very straightforward game as the Shadow. She tended to pick a couple of Free Peoples’ strongholds as targets and attacked them single-mindedly. I suggested that she should spend some Army actions to send her Southron forces closer to the front but she ignored me and so not a single Southron unit fought a battle throughout the game.
- Since Shan insisted on aggressively attacking the elves, getting them to war status was easy. As such I spent all of my early Muster action on buying elf units and quickly ran out. By the end of the game, the elves were almost completely wiped out, except for a contingent at the Grey Havens and another one at Dol Amroth. My least used forces were ironically Gondor. Late in the game, I mustered some forces to accompany Aragorn, declared Heir to Isildur, in the defense of Minas Tirith, but Shan never attacked from that direction and consequently they never saw any action.
- Shan brought Saruman out very early. Naturally she sought to attack Hornburg out of Orthanc. Since Rohan was not at war yet, I opted to concede Hornburg to preserve Rohan’s strength and of course, losing the stronghold also meant a free advance on the political track. Since I had Gandalf suicide at Lorien, I brought the upgraded version out at Fangorn and used an Ents card on Orthanc. Very conveniently, Shan had left only three Orc units there and all three died to the Ents, thereby eliminating Saruman as well.
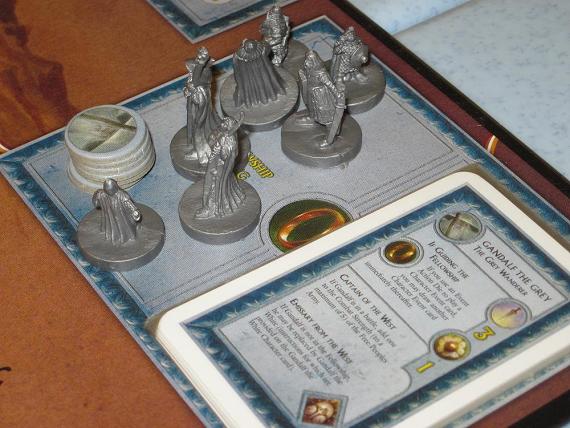
- The Fellowship moved through Moria and fortunately nothing happened to them. However, they were not so lucky after that as Shan consistently rolled good hunt rolls, managing to catch them even with a couple of Hunt dice. Legolas died with Gandalf while attempting to defend Lorien. Boromir, Merry and Pippin were all eliminated by Hunt tiles. But I brought Merry back and had him to travel to Rohan to undo the effects of the Grima Wormtongue card Shan played.
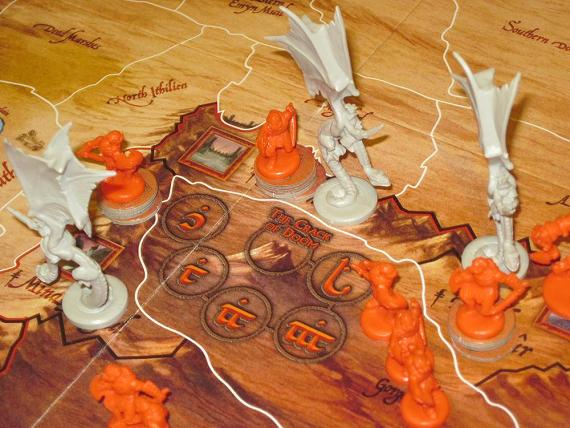
- In this way, the Fellowship reached and declared itself in Minas Tirith but had 6 or 7 points of corruption by then. I judged that to be too high to make tossing the One Ring into the Crack of Doom viable and tried for a military victory. I had even drawn the Last Battle card and was preparing to move Aragorn and an army eastwards to make the Fellowship’s journey easier but this turned out not to be necessary, so Aragorn spent the rest of the game sitting near Minas Tirith.
- After conquering four strongholds, Shan’s next target was Erebor. I never managed to get the dwarves to war status but I did mobilize the north to help defend. The attack never came however though Shan’s forces moved closer step by step. I had regrouped Gandalf and Merry with a large army of Rohan and used it to retake Hornburg, killing the Witch King who happened to be there. From there it was a short hop to Orthanc.
- My forces at Orthanc then united with a small force of the North from around Bree to move on to Moria, which fell without much fuss. Shan was probably getting tired of the game as she acted recklessly when in the long run, the military advantage was all hers. She still had huge stacks in Dol Guldur and Mordor, plus the Southrons who all went unused.

Since Shan doesn’t enjoy wargames, I don’t think I’ll be able to play another game with her. I quite liked the game but it would have been so much smoother if the game had some of the usability improvements I suggested earlier. It’s hard to talk much about game balance for such a long game after just one play, but it strikes me that having the Fellowship complete the trip to Mount Doom seems really hard. The corruption really ramps up quickly. I wonder if having the Fellowship stop in a friendly stronghold to heal for several turns in the normal procedure.
Balance-wise, I’d say that both sides are remarkably equal. The Shadow has more forces and more action dice but must lose some of those actions to hunt dice. There’s also not much that the shadow can do if the Fellowship moves slowly and carefully across the map. The Free Peoples have a limited pool of military units to draw from, less actions and more importantly, must waste some actions getting the various nations to war before being able to muster additional forces. But they only need to conquer two Shadow strongholds to get a military stronghold while the Shadow player needs to conquer many more, so they can afford to lose some places.
I’d still say that it’s harder to play the Free Peoples than the Shadow. The decisions on that side are more varied and more interesting. The Free Peoples also come under more pressure at the beginning of the game. They need the extra dice from upgrading Aragorn and Gandalf than the Shadow player needs his extra dice, and until they do, it’s very tough to get things done. The Shadow will probably just allocate one or two dice to the hunt every turn, defend all his strongholds and muster forces to attack vulnerable Free Peoples’ settlements. Even their Nazgul can instantly move anywhere on the map, making the logistics much simpler for them.

4 Responses to “War of the Ring”
We took nearly 1 hour for the rule explaining, not an hour & a half. However, that is really boring to me already, like attending a tuition class.
Cool! Now I’m really interested to play this game sometime. Like, ridiculously so. It sounds really cool, even next to the visual info problems. And I’m hugely a fan of LOTR, so…yeah. Sounds like something I’d love.
I think it’s currently out of print, so you may have a hard time finding it. I understand that a reprint is in the works.
Trackbacks
Leave a Reply